Runner? Nope! I am not a runner…however, my Valentine decor
would not be complete without a glorious
runner and I guess because I am no where near to being a runner I have to make my own! I have had a vision in my head
of a Valentine's runner for awhile now. I wanted something simple and this DIY project proved to be just that!!!!
Before Christmas I bought a spool of burlap webbing at the
fabric store. It’s the stuff used in reupholstering
furniture. I used quite a bit of it
during my Holiday decorating but, still had a lot left. I simply couldn’t stop thinking about the
surplus of red ticked burlap I had waiting for me in the closet. I swear it was calling my name! I finally got it out yesterday and I am pleased
with how my Valentine table decoration turned out! This is only the ground level of decorating but, the foundation is super important!
From start to finish this DIY runner took about 40 minutes to complete. That's not bad considering in don't think of myself as a good "sewer"! I don't like projetcts that have patterns...I hate following a pattern!!!!AARRRGGG!!!!
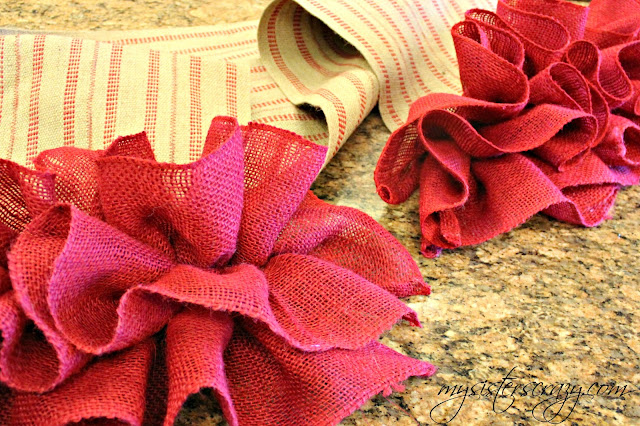
I started by my measuring my table. I then cut 5 lengths of burlap webbing the measured length. Five lengths of webbing made a great width for my table. I lined them up side by side and simply zig-zag stitched the rows together. I added a little extra color by using red thread in the machine. I loved the additional texture the bright zig-zag stitching gave the webbing.
Once the webbing was stitched together I began with
the imortant and very fullfilling ruffling step. What would this
project be without those glorious ruffles!?!
I bought red burlap ribbon at the craft stor. I actually bought 2 rolls of it. I designated one roll for each runner end. Then I divided the roll into 3 equal lengths. This gave a generious amount of ribbon for each ruffle. I made 3 ruffles for each end by pulling one piece of the twine. This ruffles the burlap easily and quickley. Once the ruffles were complete, I sewed them on the ends of the runner. Sewing the layers of ruffles as close as possible is what gives the ends of this runner substabtial volume!
My heart falls easiely for a giant back, dark hair, and soft hands...this is the first time I have been in love with a runner!
Dear Glorious Runner,
Will you be my Valentine?
Love,
The Crazy Sister :]
Love,
The Crazy Sister :]


No comments:
Post a Comment